Blogroll

Acne Prone Skin Care Routine


Acne Prone Skin Care Routine


 If you have acne-prone skin, it's important to have a consistent and gentle skincare routine to help prevent breakouts and promote clear, healthy skin. Here's a simple routine that you can try:

  1. Cleanse: Use a gentle, non-comedogenic cleanser to remove dirt, oil, and makeup from your skin. Look for products that contain salicylic acid or benzoyl peroxide, which can help to prevent breakouts.

  2. Tone: Use a toner to balance your skin's pH levels and remove any remaining traces of dirt or oil. Look for a toner that contains witch hazel, which has anti-inflammatory properties and can help to soothe irritated skin.

  3. Treat: Apply a spot treatment to any active breakouts. Look for products that contain benzoyl peroxide, salicylic acid, or tea tree oil, which can help to reduce inflammation and prevent new breakouts from forming.

  4. Moisturize: Use a lightweight, oil-free moisturizer to hydrate your skin without clogging your pores. Look for products that contain hyaluronic acid, which can help to hydrate your skin without causing breakouts.

  5. Sunscreen: Apply a broad-spectrum sunscreen with an SPF of at least 30 every day, even if you're not planning to spend time outside. Sunscreen can help to protect your skin from damage and prevent post-inflammatory hyperpigmentation (dark spots) from acne.

Remember to be gentle with your skin and avoid harsh scrubbing or exfoliating, which can irritate your skin and make acne worse. Also, be patient with your skin, as it may take several weeks or months to see improvements in your acne. If your acne is severe or persistent, it's a good idea to consult a dermatologist for further treatment options.


||

15 ST PATRICK’S DAY NAIL DESIGNS


 15 ST PATRICK’S DAY NAIL DESIGNS

If you’re looking for the best St Patrick’s Day Nail designs to recreate this year, we’ve got you the best St Patrick’s Nails for every style and taste.

If you’re a nail addict just like me, I can bet you’re on the hunt and keeping track of every single occasion that comes to switch your nail art.

I don’t know about you, but if I feel I need a glow up, the very first thing is either book an appointment to get my nails done to have the luxury feeling of self-care or I would just get my nails done myself.

St Patrick’s Day is my favorite next occasion to get my green nails done. As you know, wearing green is a must to do thing in St Patrick’s Day and it’s an excuse for me to get creative with my St Patrick’s Day nail design playing with different shades of green color.

We know how challenging it can be to get creative when it comes to have the best St Patrick’s Nails that will match your taste and style.

Thus, we’ve got you the best and the cutest St Patrick’s Day nail designs that will make you fall with St Patrick’s Nails and quickly book your nail appointment to get newly fresh nails done.

St Patrick’s Day Nail Designs

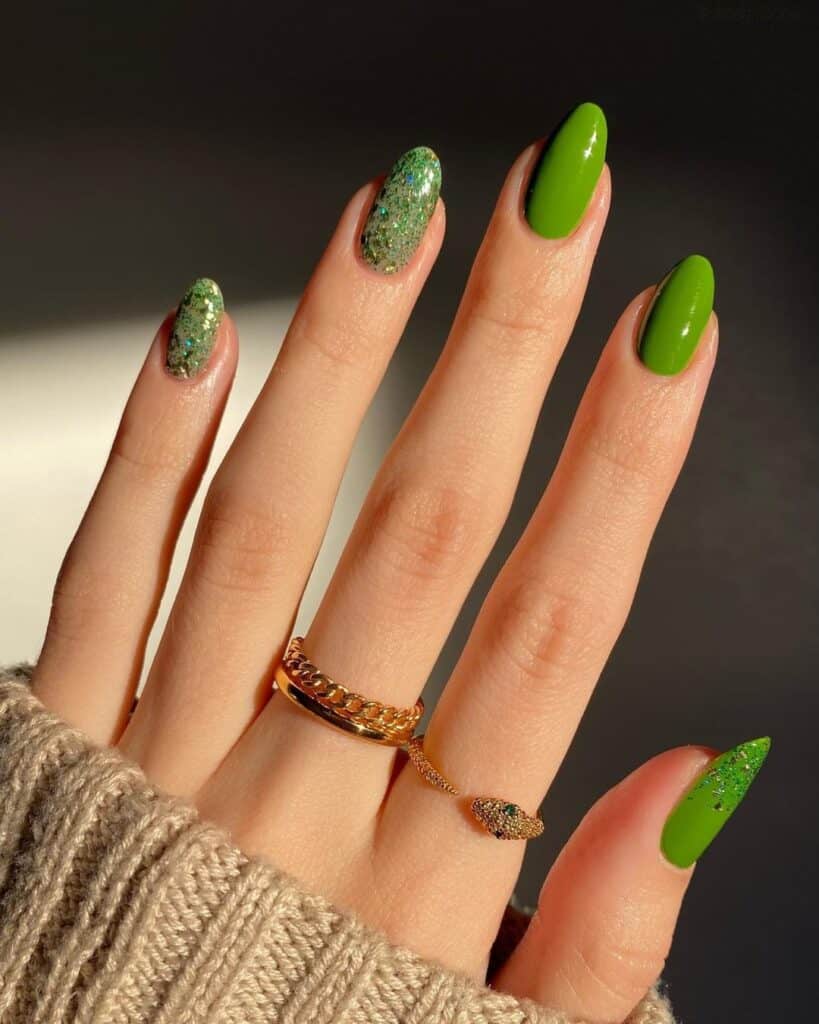
1. Green St Patrick’s Day Nails with Glittery Touch

image: Stefanie

We’re seeing a lot of two glittery and three full-colored manicures this year. And while they work beautifully, we’re ready for something a little extra like the glitter-meets-color thumb here. 

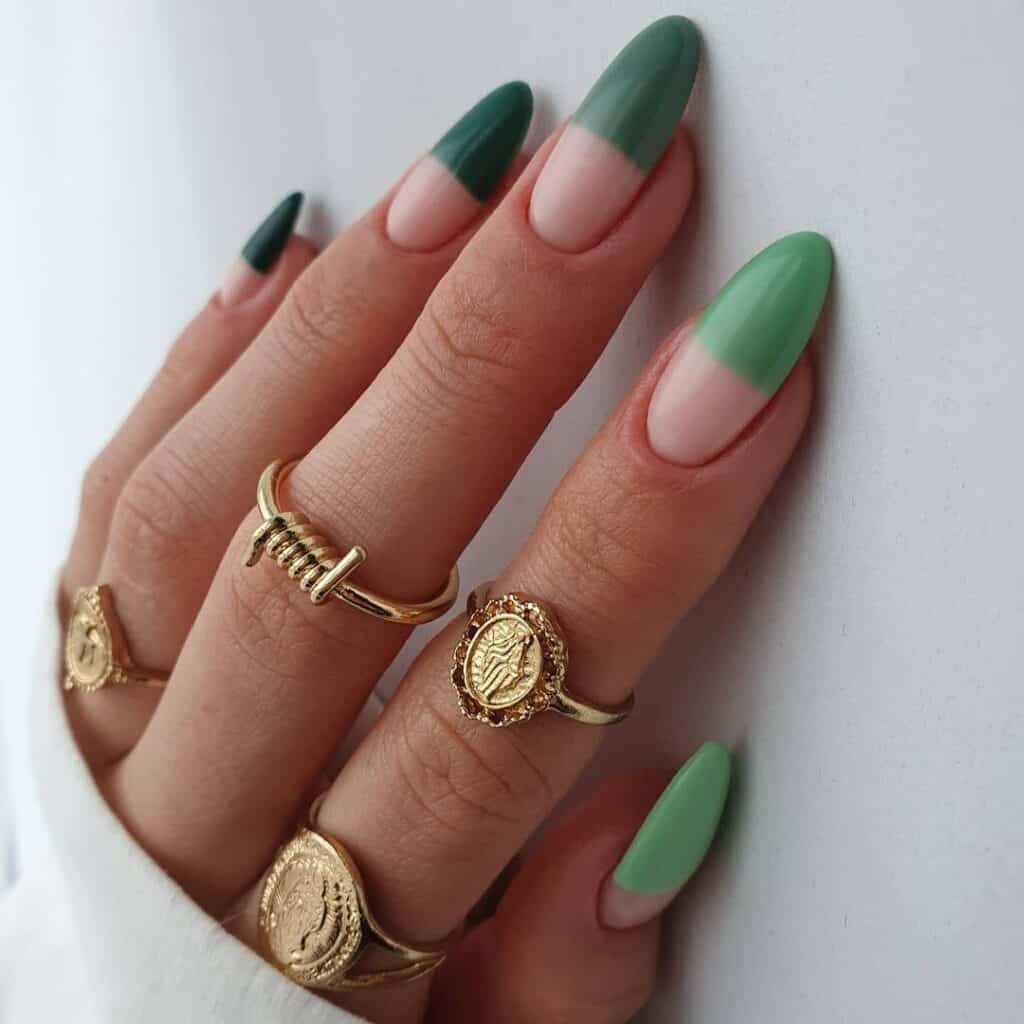
2. Viridescent St Patrick’s Nail Design

image : Alexandra

These half-color oval nails are a rare beauty. Like elongated French tips, there’s a hint of elegance to these St Patrick’s Day Nails that are elevated by the sharp contrast between natural nails and polish.

While these nails certainly fall within the DIY category, you’ll need plenty of nail polish remover and cotton buds to perfect the sharp dividing line.

 A pro tip is to cover half of the nail in tape and paint the other before removing the tape for half-nail polished perfection. 

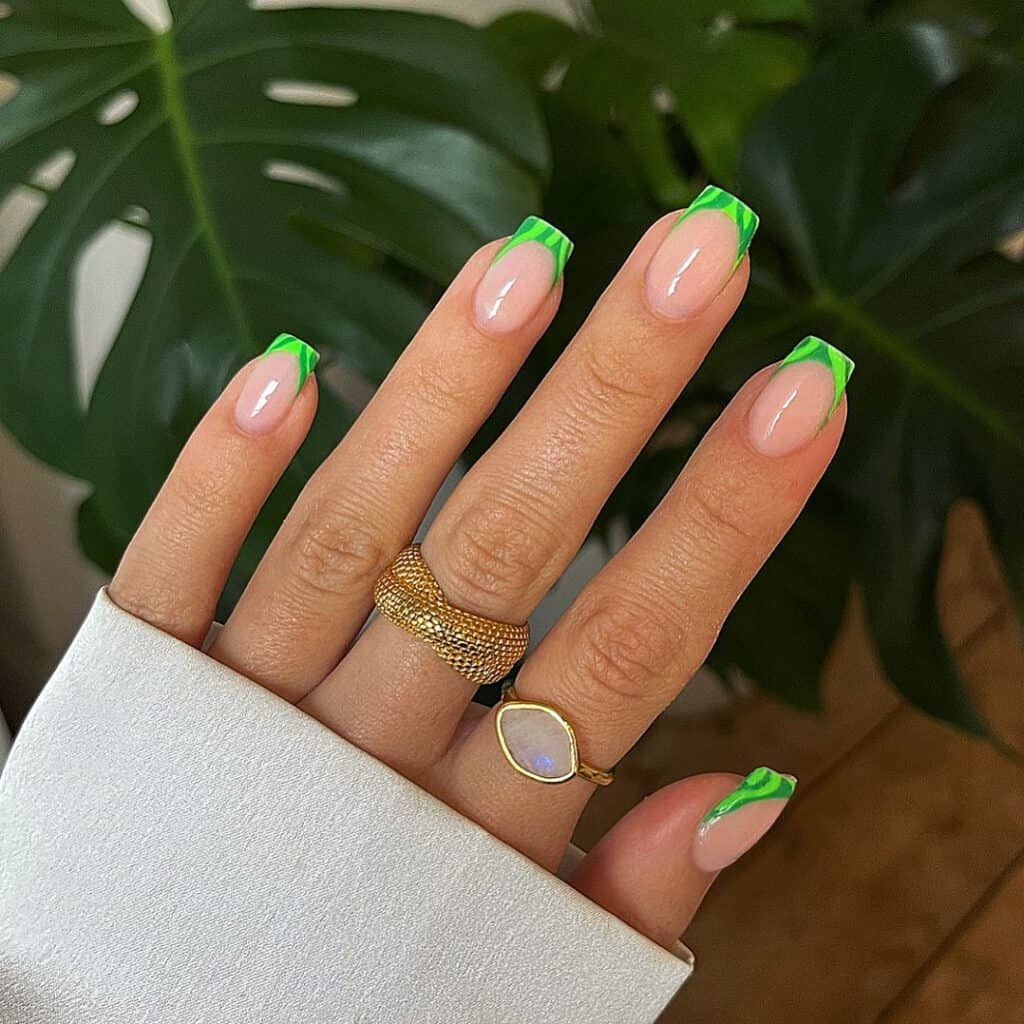
3. Green Swirly French Tips

image : NAILS BY G

Everyone knows that Frenchies can be fresh; all it takes is a little creativity, some art skills, and festively colored nail polish.

The result is this trendy St Patrick’s day manicure that’s sure to wow.

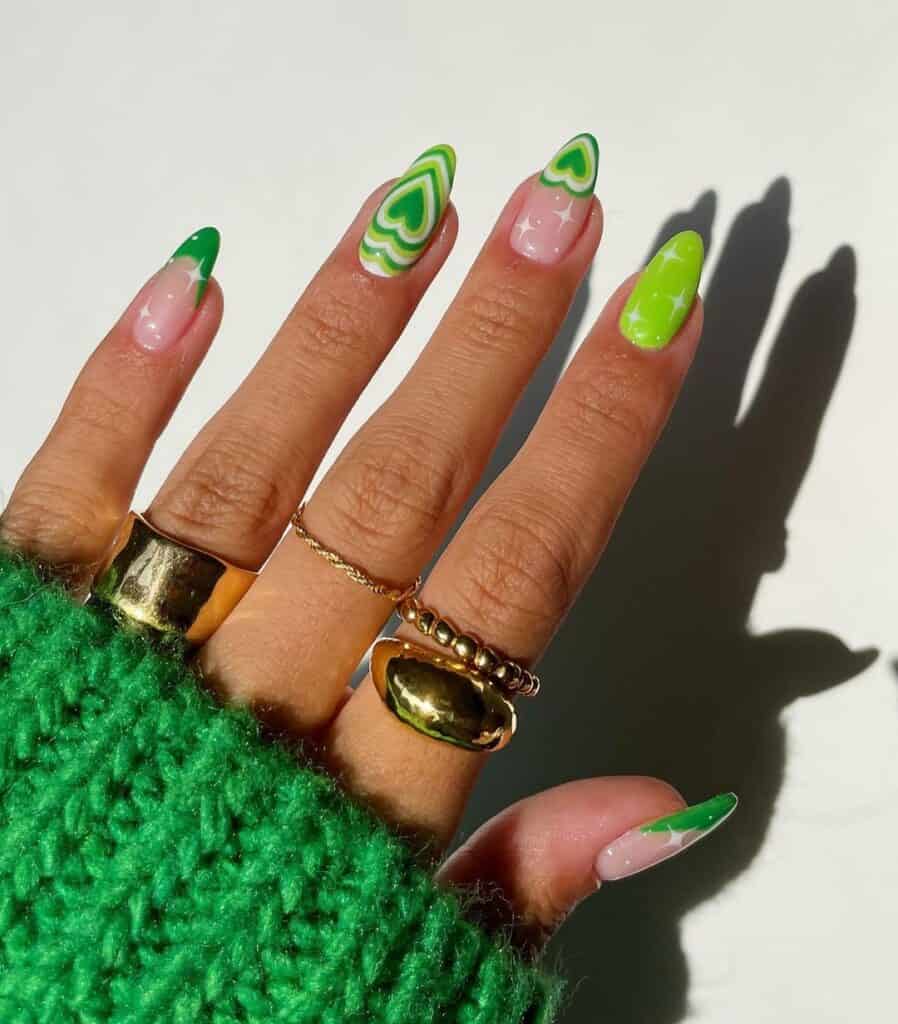
4. Layered Heart Green Nails

image : Phoebe

in terms of St Patrick’s day nail designs, this has to be the most trendy. Layered hearts are everywhere this year.

 It’s the 3D appeal that brings every manicure to life alongside their funky-fresh vibe that can’t be paralleled. 

5. Euphoria Nails for St Patrick’s Day

image : Karen

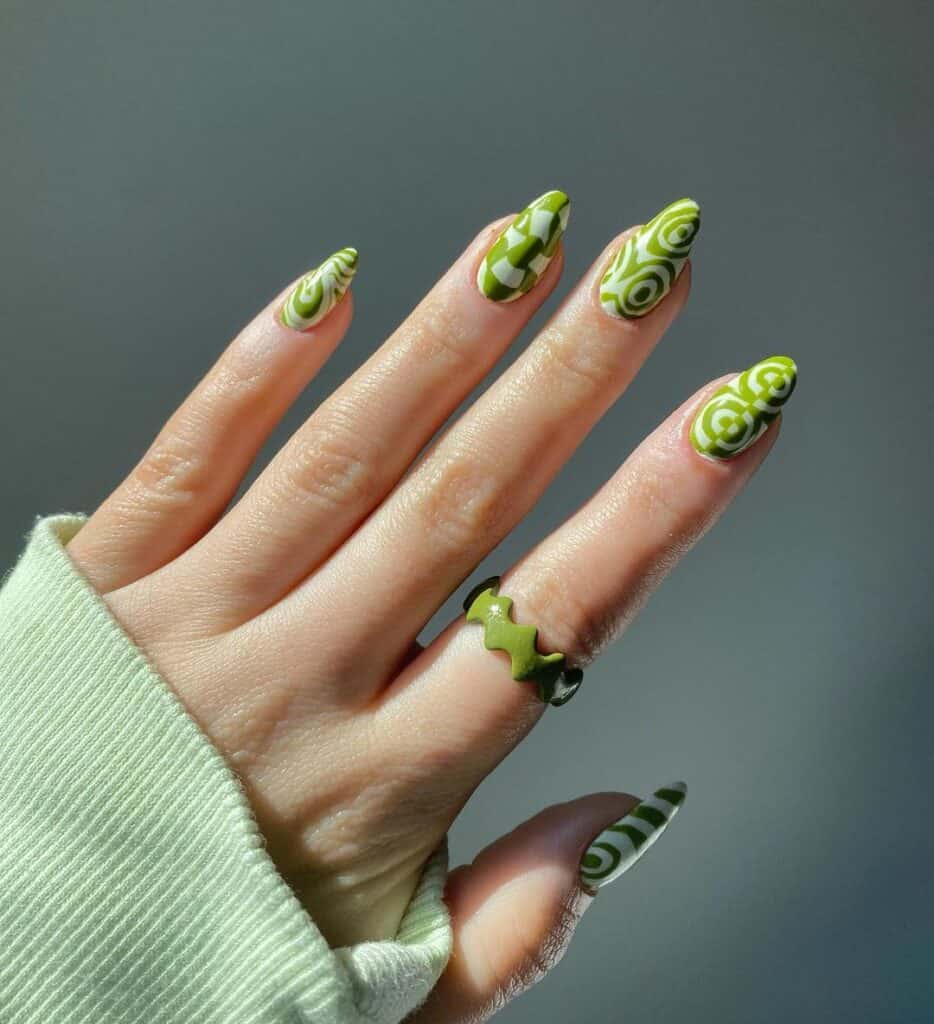
Pairing white with green makes for a captivating contrast, and that’s even before the swirls come into the picture.

These St Patrick’s day nails display a mix of geometrical illusions that evoke psychedelic vibes that are tough to master but doable.  

Related: 63 Stunning Spring Nail Designs you Have to Copy this Year.

6. Jade St Patrick’s Nail Design

image : Sarah

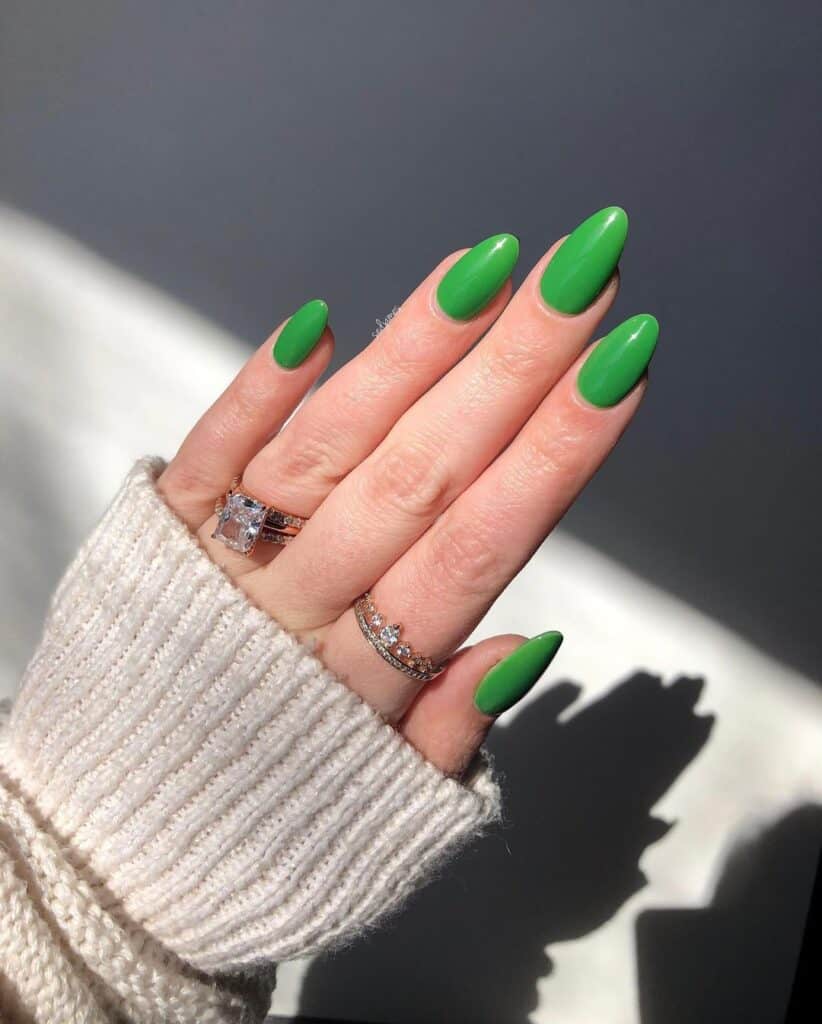
The rich, sumptuous shade of jade is perfectly reflective of Ireland this St Patrick’s day.

 It’s one of the liveliest yet solid green colors that leaves no room for doubt about what special day you’re celebrating with these fabulous nails. 

7. Different Shades of Green Nail Colors

image : Karen
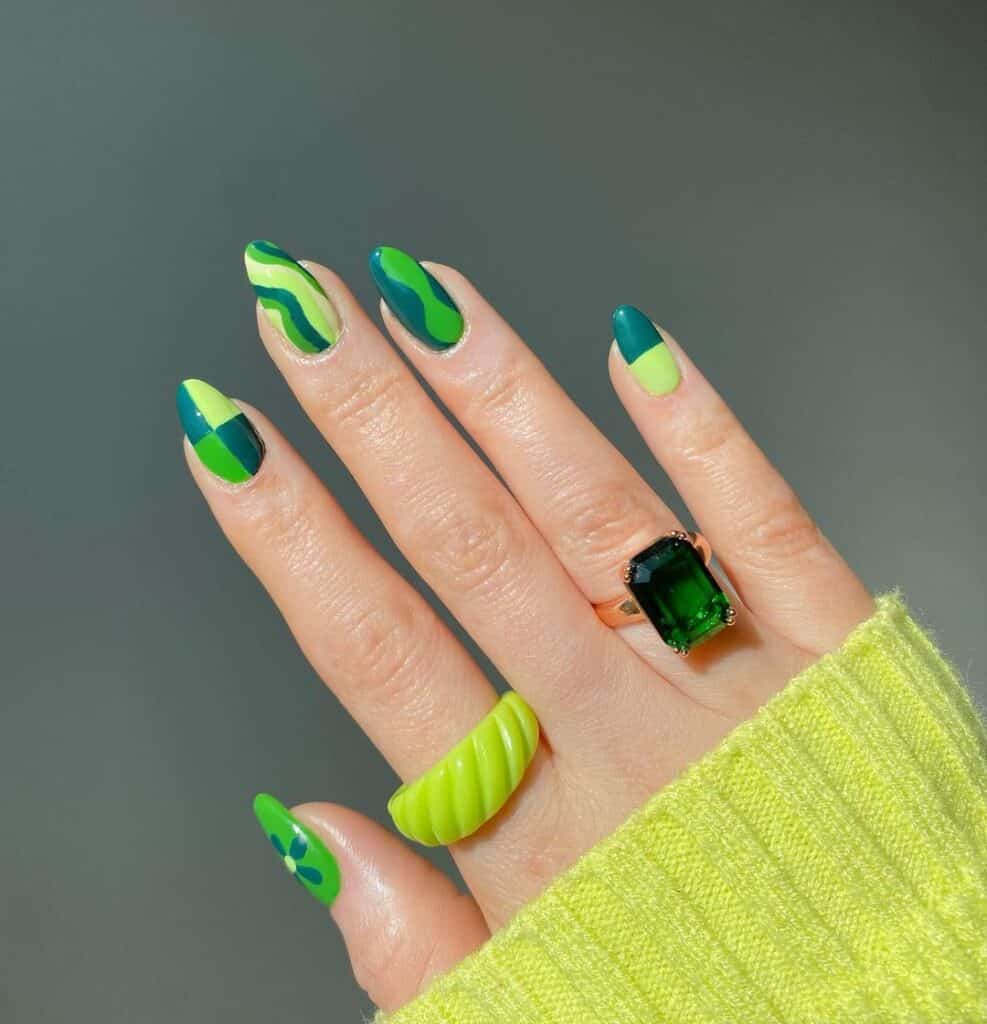
I have yet to come across a shade of green that doesn’t look great on nails, and this St Patrick’s Day-inspired manicure shows exactly what I mean by that.

Showing off exactly what green nail polish is capable of with a little skill, these green nails make the best of waves, swirls, color block, and adorable nail art for a manicure that’s got it all. 

8. Green Zebra Nails

image : Naomi

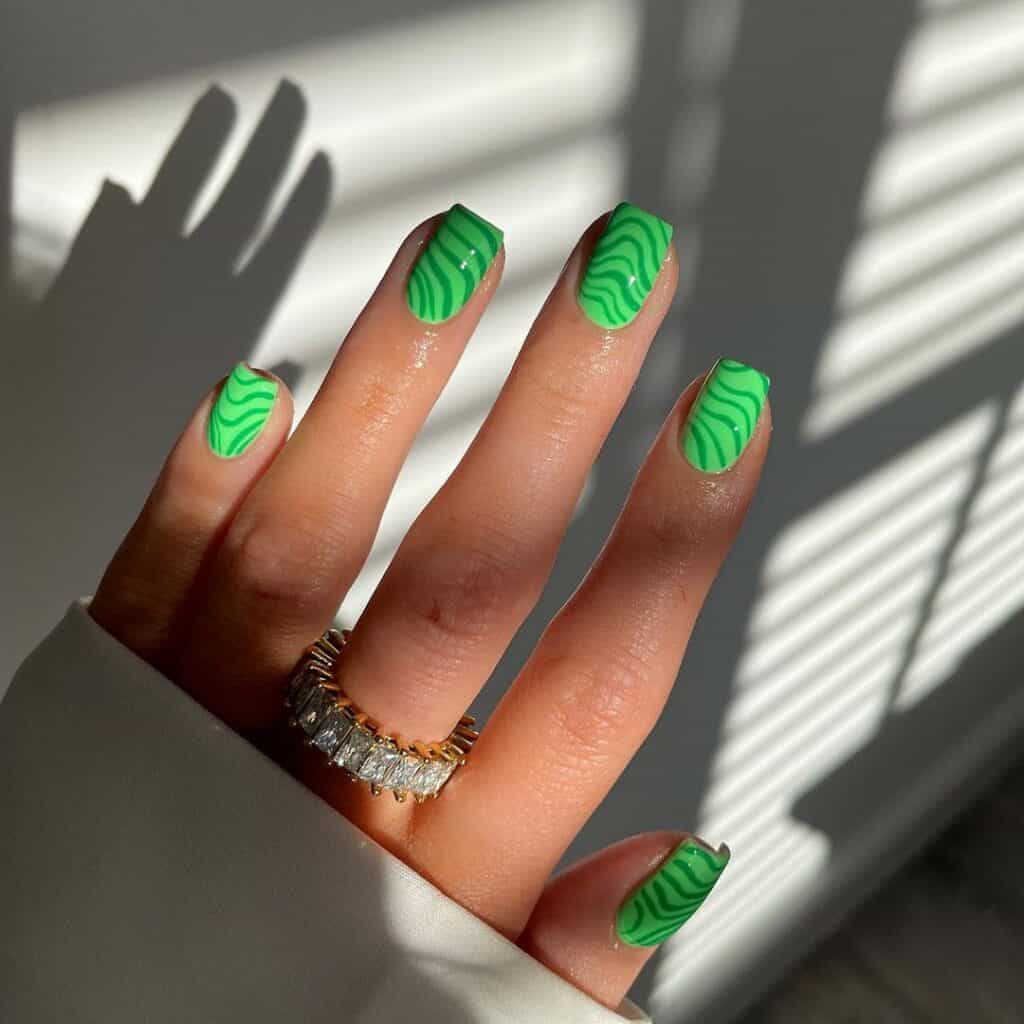
We’re so used to the stark black-and-white contrast of classic zebra nails that a complementing shades twist is always a nice surprise.

Using two different shades of green, a gorgeous zebra pattern is created strategically using fine lines that look best on short nails.

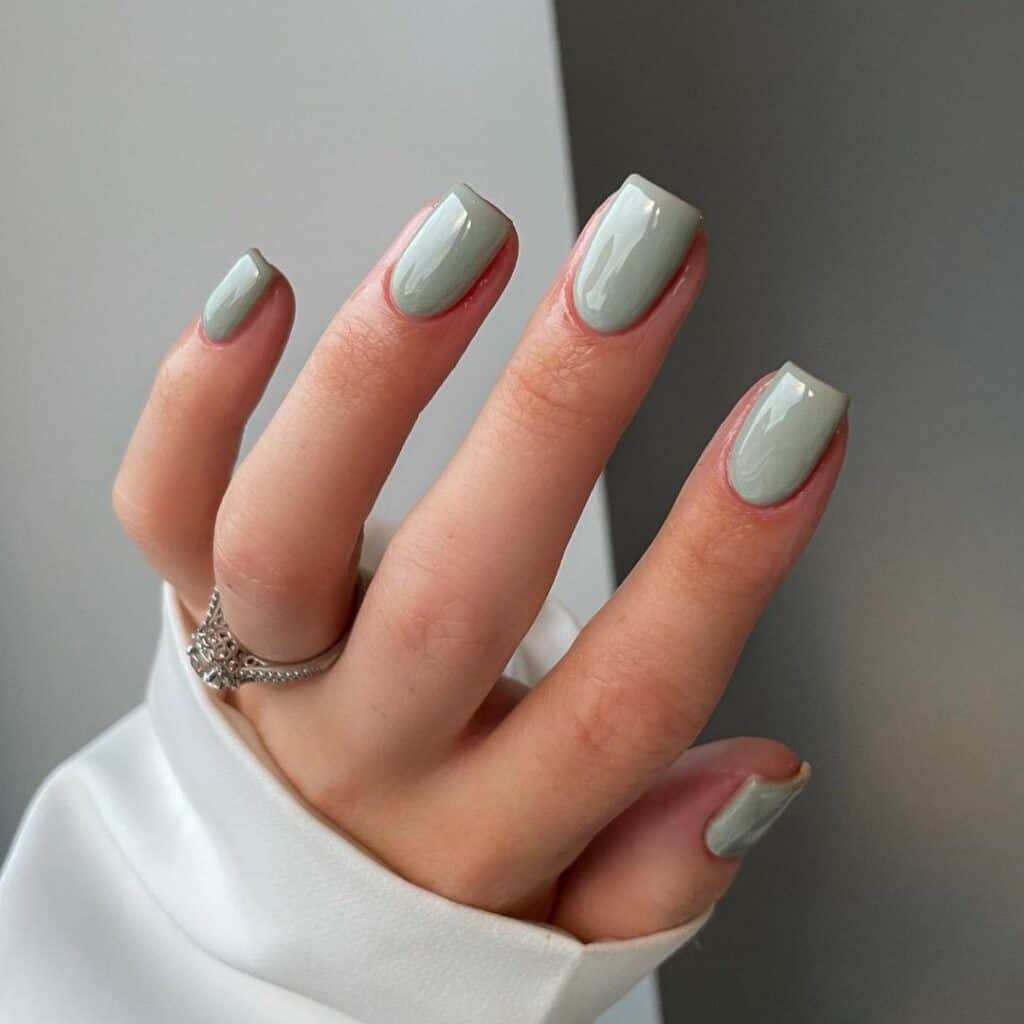
9. Laurel St Patrick’s Nail Color

image : Naomi

The best thing about green nails? There are only a zillion different shades to choose from, so adjust according to your mood or the event vibe.

A little bit like with this neutral shamrock-green nail color: light, fun, and a great spring nail idea.

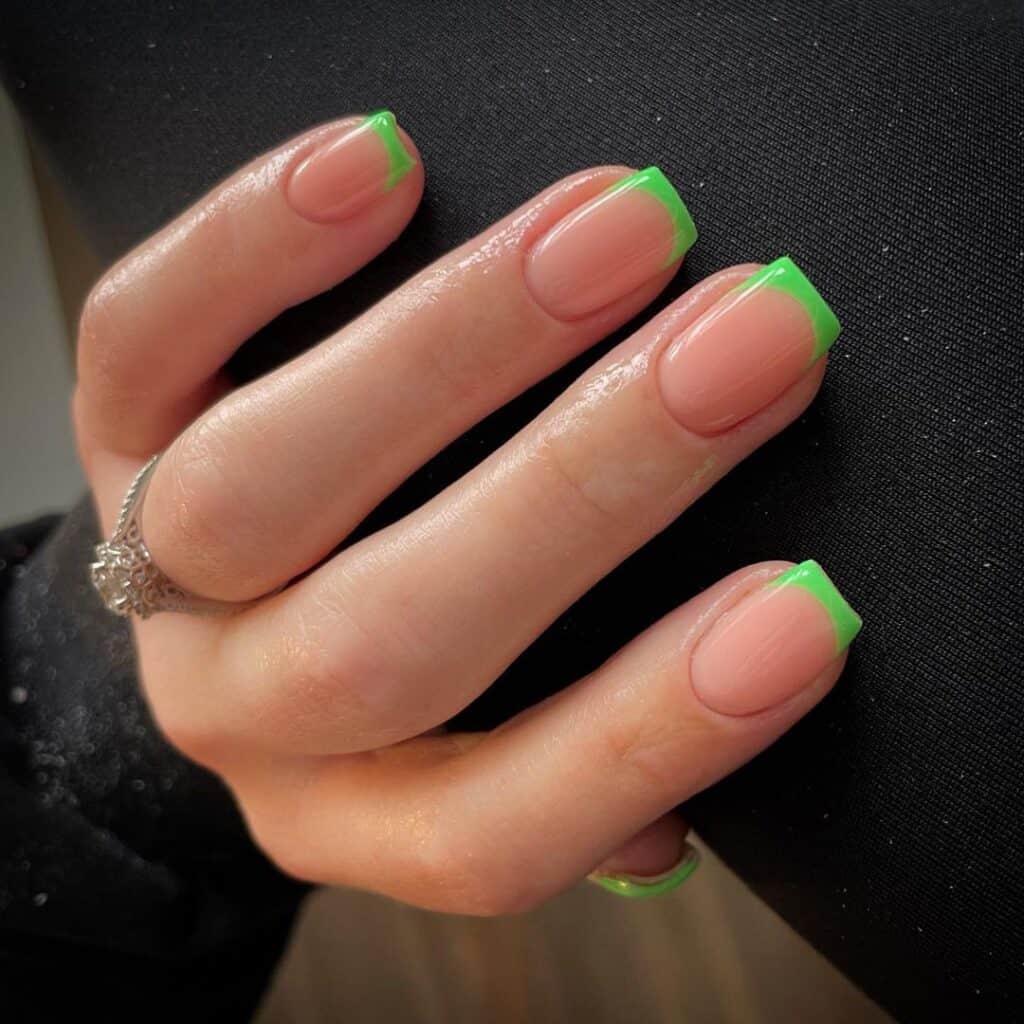
10. Lime French Tips

image : Naomi

How to Remove Unwanted Hair from Your Upper Lip Naturally


 How to Remove Unwanted Hair from Your Upper Lip Naturally


5 Home Remedies to Remove Unwanted Hair Permanently


  1. Sugar and lemon juice: Mix equal parts of sugar and lemon juice and apply to the area where you want to remove hair. Leave it on for 20-25 minutes and then remove with a damp cloth. Repeat this process regularly to see results.

Sugar and lemon juice:


Sugar and lemon juice is a popular home remedy for hair removal. The sugar acts as an exfoliant, removing dead skin cells and hair, while the lemon juice acts as a natural bleach, lightening the remaining hair.

To use this remedy, mix equal parts of sugar and lemon juice to form a paste. Apply to the area where you want to remove hair and massage in a circular motion. Leave it on for 20-25 minutes and then remove with a damp cloth. Repeat this process regularly to see results.

It is worth noting that this method of hair removal is not permanent, and hair will grow back. However, with regular use, it may make the hair finer and lighter. It is also important to test the mixture on a small patch of skin before applying it to larger areas, as the lemon juice may cause irritation or sensitivity to some people.


  1. Turmeric and gram flour: Mix equal parts turmeric and gram flour with water to form a paste. Apply to the area where you want to remove hair, and leave on for 20-25 minutes. Scrub in a circular motion while removing the paste. Repeat this process regularly.

Turmeric and gram flour:

Turmeric and gram flour is another popular home remedy for hair removal. Turmeric has hair-inhibiting properties, while gram flour acts as an exfoliant, helping to remove dead skin cells and hair.

To use this remedy, mix equal parts turmeric powder and gram flour with water to form a paste. Apply the paste to the area where you want to remove hair, and leave it on for 20-25 minutes. Scrub in a circular motion while removing the paste. Repeat this process regularly to see results.

This method is not permanent, but with regular use, it may make the hair finer and lighter. It is also important to test the mixture on a small patch of skin before applying it to larger areas, as turmeric may cause irritation or sensitivity to some people.

Keep in mind that turmeric can temporarily stain the skin, so you should be careful not to leave the paste on for too long, and also be careful when washing it off.


  1. Egg white and cornstarch: Mix an egg white and 2 tablespoons of cornstarch to form a paste. Apply to the area where you want to remove hair and let it dry. Once dry, gently remove the paste by peeling it off. Repeat this process regularly.

Egg white and cornstarch:

Egg white and cornstarch is another popular home remedy for hair removal. The proteins in the egg white help to bind the hair, while cornstarch acts as a thickening agent.

To use this remedy, mix an egg white and 2 tablespoons of cornstarch to form a paste. Apply the paste to the area where you want to remove hair and let it dry. Once dry, gently remove the paste by peeling it off. Repeat this process regularly to see results.

It is worth noting that this method of hair removal is not permanent, and hair will grow back. However, with regular use, it may make the hair finer and lighter. It is also important to test the mixture on a small patch of skin before applying it to larger areas, as the egg white may cause an allergic reaction in some people.

Keep in mind that this method might not be suitable for people with sensitive skin.


  1. Papaya and turmeric: Mix mashed papaya and a pinch of turmeric to form a paste. Apply to the area where you want to remove hair and leave on for 20-25 minutes. Gently scrub in a circular motion while removing the paste. Repeat this process regularly.

Papaya and turmeric:


Papaya and turmeric is another home remedy that is believed to be effective in removing unwanted hair. Papaya is rich in an enzyme called papain, which is said to break down the hair follicles, making it easier to remove hair. Turmeric has hair-inhibiting properties, which can slow down hair growth.

To use this remedy, mix mashed papaya and a pinch of turmeric to form a paste. Apply to the area where you want to remove hair and leave on for 20-25 minutes. Gently scrub in a circular motion while removing the paste. Repeat this process regularly to see results.

As with other home remedies, it's worth noting that this method is not permanent, and hair will grow back. However, with regular use, it may make the hair finer and lighter. It is also important to test the mixture on a small patch of skin before applying it to larger areas, as turmeric may cause irritation or sensitivity to some people.

Keep in mind that papaya and turmeric can temporarily stain the skin, so you should be careful not to leave the paste on for too long, and also be careful when washing it off.


  1. Sugar and wax: Mix sugar, lemon juice, and water to form a paste. Heat the mixture until it becomes a wax-like consistency. Apply to the area where you want to remove hair and remove with a strip of cloth in the opposite direction of hair growth. Repeat this process regularly.

Sugar and wax:

Sugar and wax is a method of hair removal that is similar to traditional waxing. The sugar mixture acts as a natural wax, which is used to remove hair from the root.

To use this remedy, mix sugar, lemon juice, and water to form a paste. Heat the mixture until it becomes a wax-like consistency. Apply to the area where you want to remove hair and remove with a strip of cloth in the opposite direction of hair growth. Repeat this process regularly to see results.

It's worth noting that this method is not permanent, and hair will grow back. However, with regular use, it may make the hair finer and lighter. It is also important to test the mixture on a small patch of skin before applying it to larger areas, as the lemon juice may cause irritation or sensitivity to some people.

Keep in mind that this method might not be suitable for people with sensitive skin or for those with fine hair, as it can be quite painful. It's recommended to be done by a professional.

Please note that these methods are home remedies and may not work for everyone. Consult with a dermatologist before trying any hair removal method, especially if you have sensitive skin.